O2 Switch uses a firewall called Tiger Protect to secure websites. By default, the Tiger Protect rules are restrictive and may prevent WP Umbrella from connecting to your website. This guide will walk you through adjusting the Tiger Protect settings to whitelist WP Umbrella and ensure it functions correctly.
Estimated Time to Complete: 2 minutes
Prerequisites: Website hosted on O2 Switch, access to your O2 Switch account, and WP Umbrella installed on your website.
Log in to your O2 Switch account and go to your cPanel.
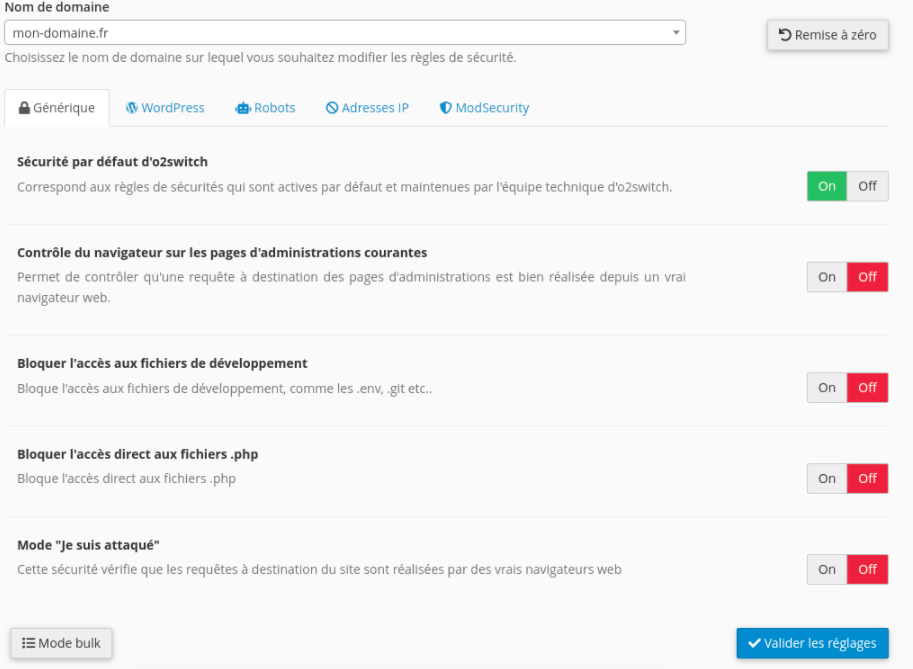
Navigate to Tiger Protect > General Settings.
Deactivate the "I'm being under attack" option.
Click on the IP Address tab.
Deactivate the "Block IP with a bad reputation" option.
Make sure you’re logged into the correct account and have the necessary permissions. If you still can’t find it, contact O2 Switch support.
You can adjust the settings to allow WP Umbrella’s IP addresses if you prefer not to deactivate them entirely. Feel free to contact support if you need guidance on this.
Ensure you’ve saved all changes and cleared your browser cache. If the issue persists, try restarting the firewall or reach out to WP Umbrella support.
That’s it! You've successfully whitelisted WP Umbrella on Tiger Protect, and your website should now communicate seamlessly with WP Umbrella. If you encounter any issues, don’t hesitate to reach out to our support team for assistance! 😊
